Draining Oil
Oil, in service, is constantly exposed to many harmful substances that reduce its ability to protect moving parts.
The main contaminants are:
- Moisture
- Acids
- Dirt
- Carbon
- Metallic particles
Because of the accumulation of these harmful substances, common practice is to drain the entire lubrication system at regular intervals and refill with new oil. The time between oil changes varies with each make and model aircraft and engine combination.
Oil and Filter Change and Screen Cleaning.
One manufacturer recommends that for new, remanufactured; or newly overhauled engines and for engines with any newly installed cylinders, the oil should be changed after the first replacement/screen cleaning at 25 hours. The oil should be changed, filter replaced or pressure screen cleaned, and oil sump suction screen cleaned and inspected.
A typical interval for oil change is 25 hours, along with a pressure screen cleaning and oil sump suction screen check for all engines employing a pressure screen system. Typical 50-hour interval oil changes generally include the oil filter replacement and suction screen check for all engines using full-flow filtration systems.
A time maximum of 4 months between servicing is also recommended for oil system service.
Oil analysis.
The proper nomenclature is actually “spectrographic oil analysis,” or commonly referred to as a SOAP sample and it has been used for decades to measure the condition of engine oil. This process is more commonly done in the general aviation industry and often seen in the recreational aviation sector.
During this analysis, the user sends a sample of oil to a spectrographic analysis laboratory, where a portion of the oil sample is run through a spectrometer. That device analyses the oil and gives the levels of the various metals and additives which are present in the oil. Those levels are a measure of how much your engine is wearing.
Lubrication System
Oil Level Check
Always allow engine to cool down to ambient temperature before starting any work on the lubrication system. Severe burns and scalds may result from hot oil coming into contact with the skin. Switch off ignition and remove ignition key. To assure that the engine does not turn by the starter, disconnect the negative terminal of aircraft battery. Before checking the oil level, make sure that there is not excess residue oil in the crankcase.
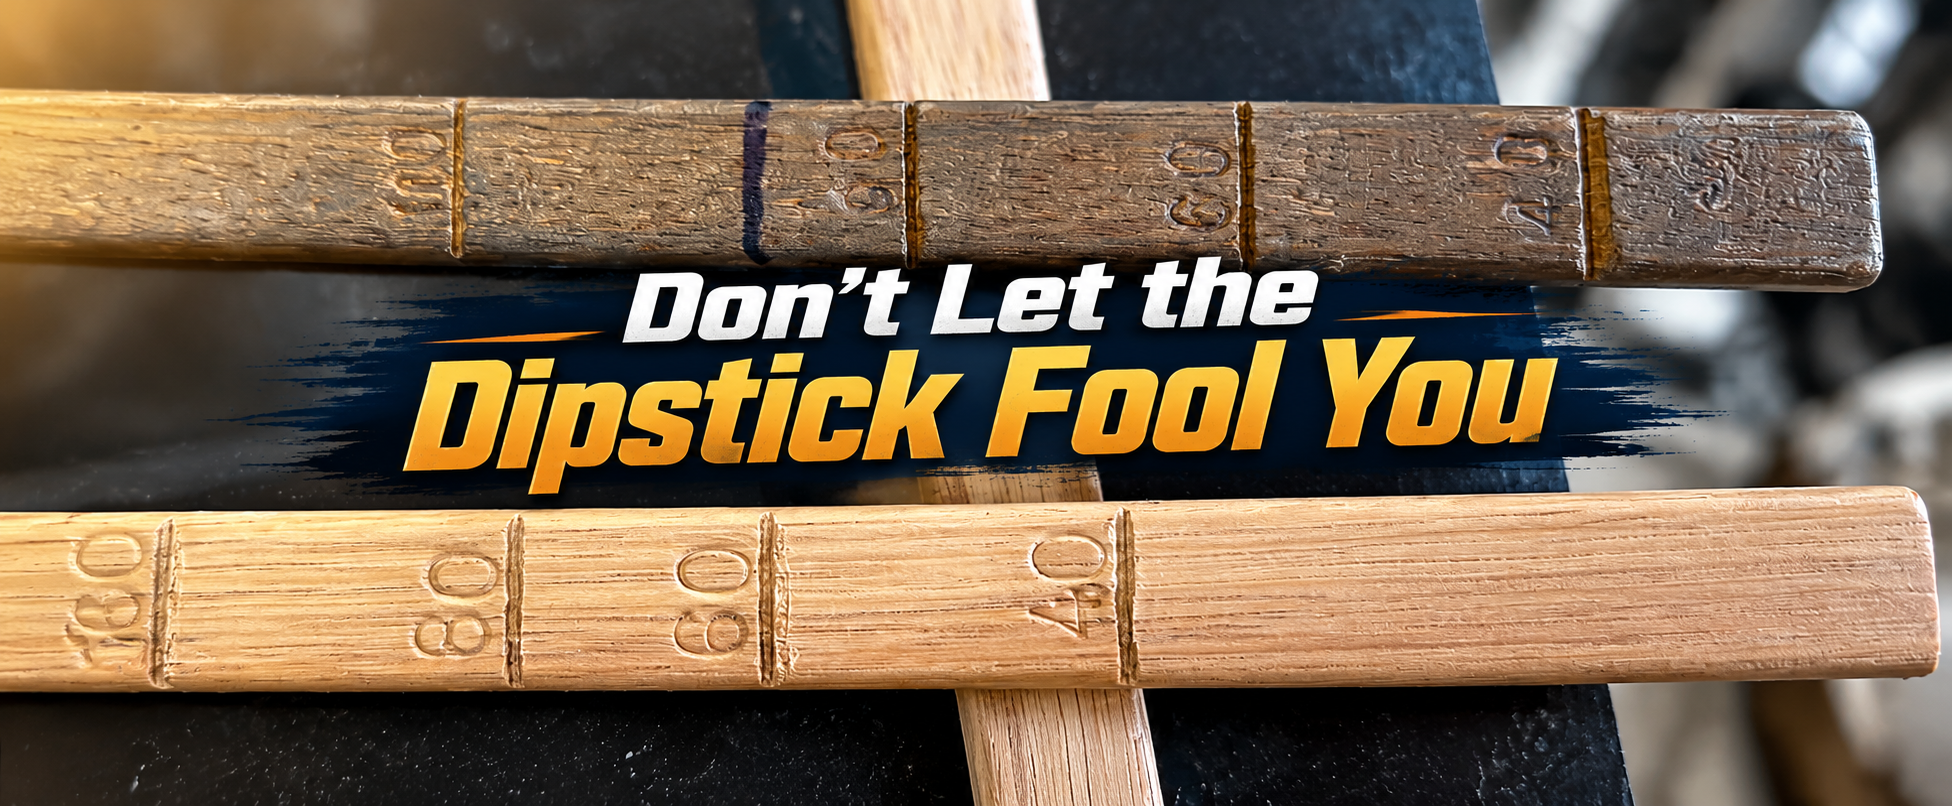
Prior to oil level check, turn the propeller several times by hand in the direction of engine rotation to pump all the oil from the engine to the oil tank. This process is completed when air flows back to the oil tank. This air flow can be perceived as a gurgling noise when the cap of the oil tank is removed. The oil level in the oil tank should be between the two marks (maximum/minimum) on the oil dipstick, but must never fall below the minimum mark. [Figure 1]
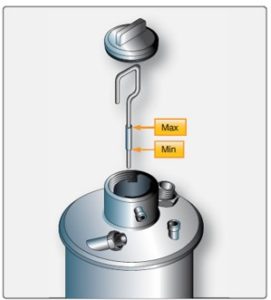
Replenish oil as required, but for longer flights, replenish oil to maximum mark to provide for more of an oil reserve. During standard engine operation, the oil level should be mid-way between the maximum and minimum marks a higher oil level (over servicing). Oil can escape through the venting (breather) passage.
Oil Change
It is advisable to check the oil level prior to an oil change, as it provides information about oil consumption. Run engine to warm the oil before beginning the procedure. Taking proper precautions, crank the engine by hand to transfer the oil from the crankcase.
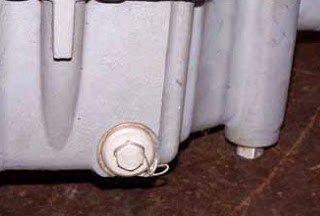
Remove the safety wire and oil drain screw (1) from the oil tank, drain the used oil, and dispose of as per environmental regulations. [Figure 11-32] Remove and replace oil filter at each oil change. It is not necessary to remove oil lines and other oil connections.
Draining the suction lines, oil cooler, and return line is not necessary and must be avoided, as it results in air entering the oil system. Replacement of the oil filter and the oil change should be accomplished quickly and without interruption to prevent a draining of the oil system and the hydraulic tappets.
Compressed air must not be used to blow through the oil system (or oil lines, oil pump housing, oil bores in the housing). Replace the oil drain screw torque and safety wire.
Only use the appropriate oil in accordance with the latest operator’s manual and service instruction. The engine must not be cranked when the oil system is open. After the oil change is accomplished, the engine should be cranked by hand in the direction of engine rotation (approximately 20 turns) to completely refill the entire oil circuit.
Cleaning the Oil Tank
Cleaning the oil is optional and requires venting of the oil system. It is only necessary to clean the oil tank and the inner parts if there is heavy oil contamination. The procedure for cleaning the oil tank is shown in Figure 2.
[ Above Right ]
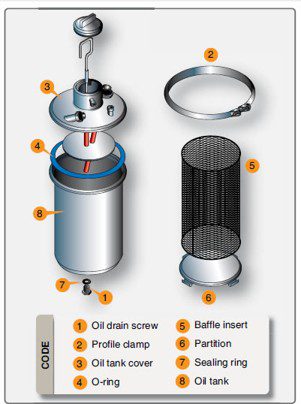
Detach the profile clamp (2) and remove the oil tank cover (3), together with the O-ring (4) and the oil lines. Remove the inner parts of the oil tank, such as the baffle insert (5) and the partition (6). Clean oil tank (8) and inner parts (5, 6), and check for damage. Be aware that incorrect assembly of the oil tank components can cause engine faults or engine damage. Replace the drain screw with a new sealing ring (7) and tighten to 25 Newton meters (Nm) (18.5 ft/lb) and safety wire. Reassemble the oil tank by following the same steps in reverse order.
Inspecting the Magnetic Plug
Remove the magnetic plug and inspect it for accumulation of chips. [Figure 3] The magnetic plug (torx screw) is located on the crankcase between cylinder 2 and the gearbox. This inspection is important because it allows conclusions to be drawn on the internal condition of the gearbox and engine, and reveals information about possible damage. If a significant amount of metal chips are detected, the engine must be inspected, repaired, or overhauled. Steel chips in low numbers can be tolerated if the accumulation is below 3 mm (0.125 in). [Figure3]
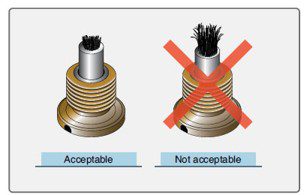
In the case of unclear findings, flush the oil circuit and fit a new oil filter. Afterwards, conduct an engine test run and inspect the oil filter once more. If there are larger accumulations of metal chips on the magnetic plug, the engine must be repaired or overhauled in accordance with the manufacturer’s instructions for continued airworthiness. A detailed inspection of affected engine components must be performed. If the oil circuit is contaminated, replace the oil cooler and flush the oil circuit, then trace the cause and remedy the situation. If the magnetic chip is found to have no metal, then clean and reinstall. Tighten the plug to a torque of 25 Nm (18.5 ft/lb). Safety wire the plug and inspect all systems for correct function.
Oil Filter/Screen Content Inspection
Check for premature or excessive engine component wear that is indicated by the presence of metal particles, shavings, or flakes in the oil filter element or screens. The oil filter can be inspected by opening the filter paper element. Check the condition of the oil from the filter for signs of metal contamination. Then, remove the paper element from the filter and carefully unfold the paper element; examine the material trapped in the filter. If the engine employs a pressure screen system, check the screen for metal particles. After draining the oil, remove the suction screen from the oil sump and check for metal particles.
[Figure 2] If examination of the used oil filter or pressure screen and the oil sump suction screen indicates abnormal metal content, additional service may be required to determine the source and possible need for corrective maintenance. To inspect the spin on filter the can must be cut open to remove the filter element for inspection. Using the special filter cutting tool, slightly tighten the cutter blade against filter and rotate 360º until the mounting plate separates from the can.
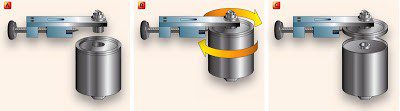
[Figure 3] Using a clean plastic bucket, move the filter to remove contaminants. Use a clean magnet and check for any ferrous metal particles in the filter. Using a bright light, inspect for any nonferrous metals.
Assembly of and Installation of Oil Filters
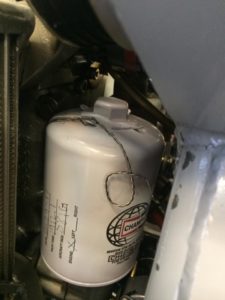
Spin-on filters generally have installation instructions on the filter. Place a coating of engine oil on the rubber gasket, install the filter, torque and safety wire it. Always follow the manufacturer’s current instructions to perform any maintenance.